
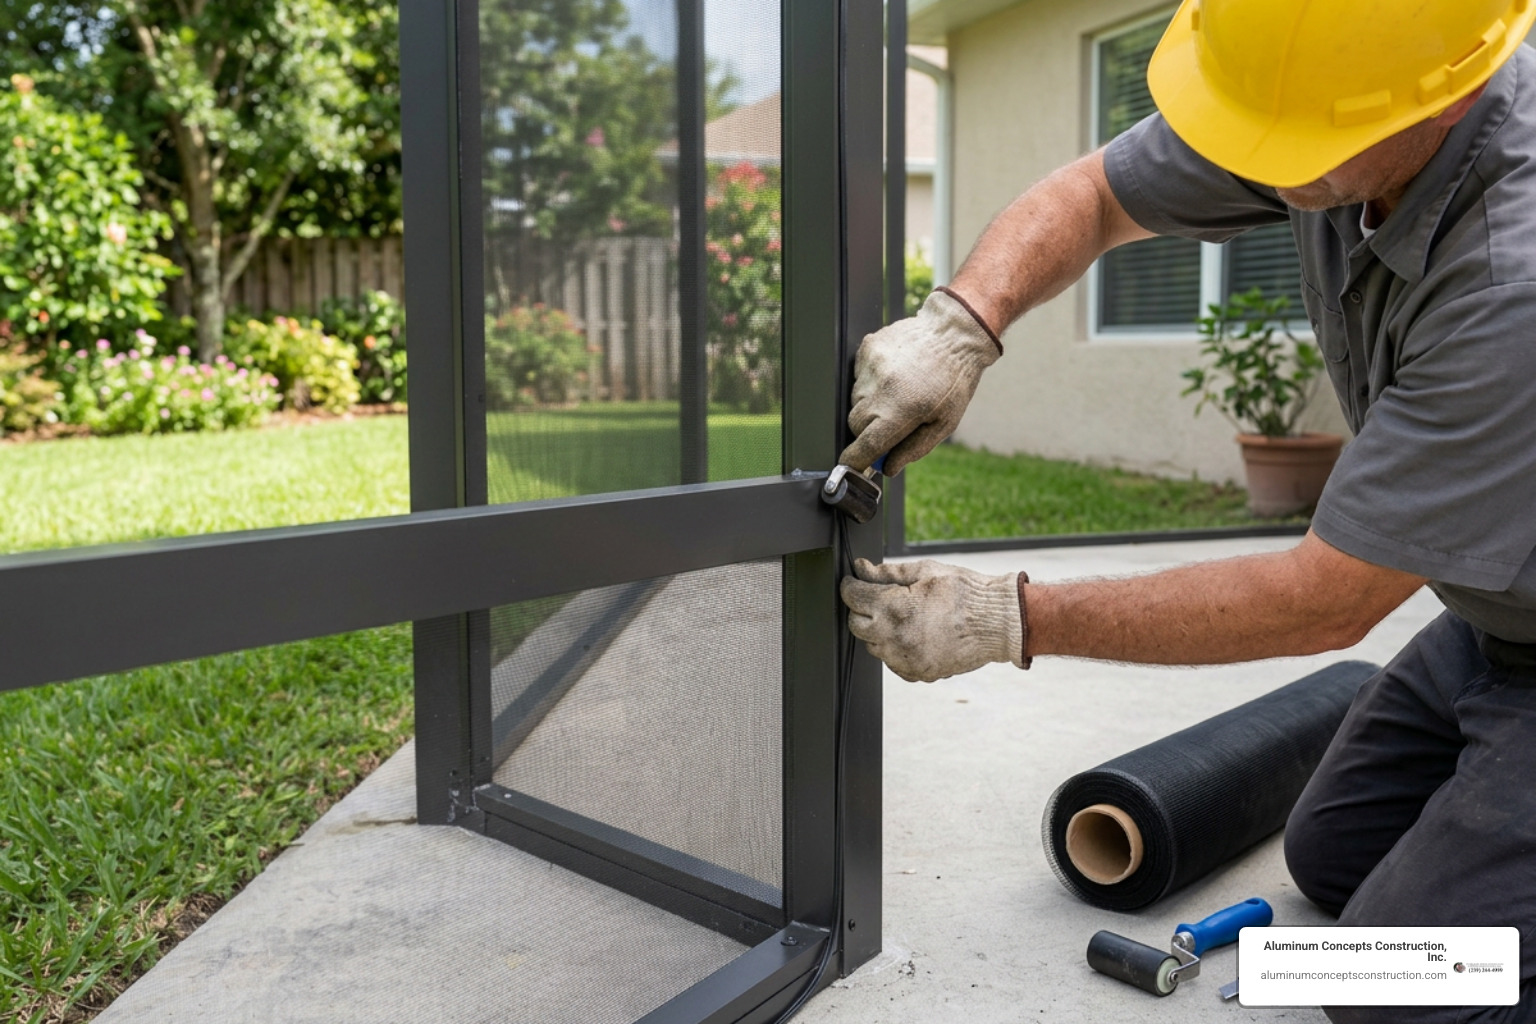
Installing Screen Enclosure Kits: What Every Homeowner Must Know First
Installing a Screen Enclosure Starts With a Solid Plan
Installing a screen enclosure is manageable when you treat it as a framing and weatherproofing project, not just a screening job. First, measure the slab or deck, soffit height, and door opening; then choose a frame system, anchor its channels to sound surfaces, set every post plumb and level, and install mesh with the spline made for that system. Check local permits, HOA rules, and wind-load requirements before ordering materials, especially in Southwest Florida.
A good kit can turn a patio or lanai into a lower-maintenance outdoor room that blocks insects and debris while preserving airflow. But small layout errors show up fast: even a quarter-inch out of level across a long span can leave visible gaps and make doors bind.
For most first-time DIY installers, fiberglass mesh is the easiest material to handle. Aluminum framing offers durable, corrosion-resistant support, while vinyl cap-and-base systems can simplify screening because their trim snaps over the installed mesh. Your site conditions, opening size, exposure to wind, and desired finish should guide the choice.
I am Sherman Walker, owner of Aluminum Concepts Construction, Inc., with nearly 25 years of residential construction and aluminum specialty experience in Southwest Florida. I have spent my career helping homeowners understand the details that matter when installing screen enclosure systems, from solid anchoring and drainage to clean, durable finishes.
Planning, Measuring, and Framing System Selection
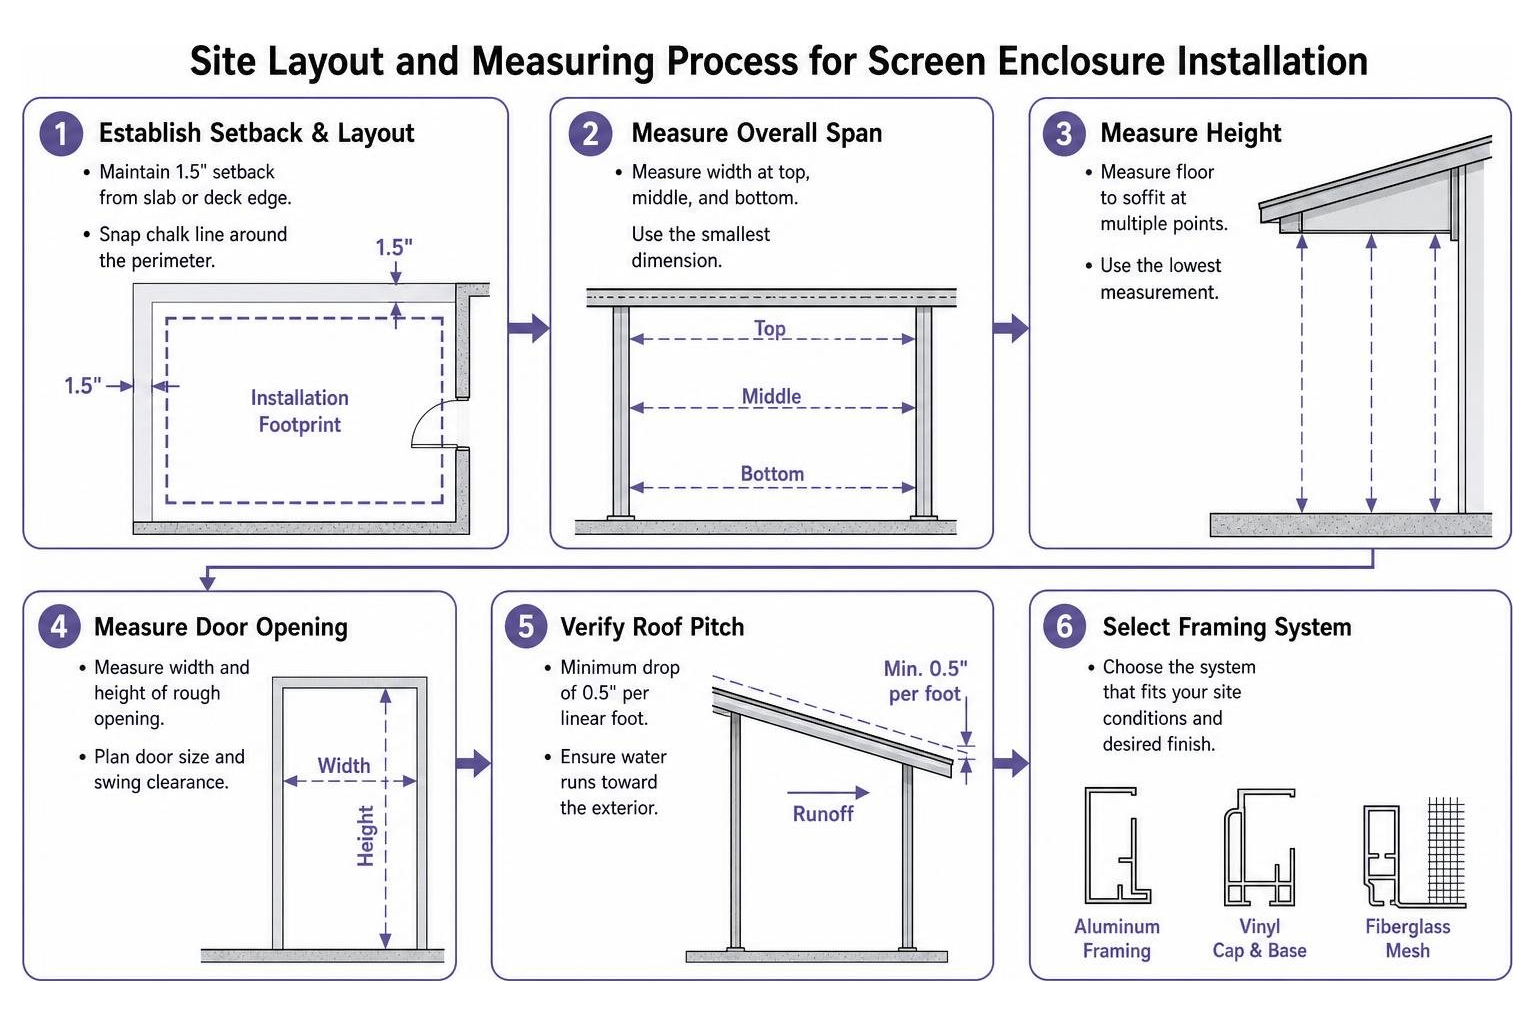
Before picking up a saw or ordering parts, you need a precise spatial assessment of your patio, deck, or lanai. In construction vocabulary, taking accurate measurements is the difference between a clean, tight build and hours of frustration trying to force misaligned extrusions to meet. A quarter-inch difference across a 12-foot span creates an unsightly gap at the screen line that you cannot hide with caulking.
Start by measuring the overall span, the floor-to-soffit clearance at multiple points, and the existing wall transitions. If you are tying a roofed structure into an existing fascia, calculate the proper roof pitch: a minimum drop of 0.5 inches per linear foot is mandatory to guarantee adequate water runoff. To understand how material choices and site preparation influence overall project investments, review our breakdown of cost factors when enclosing a lanai. For a complete technical walkthrough of structural layout standards, consult this comprehensive Guide to Aluminum Enclosure Planning.
Layout Planning and Structural Sizing
Never mount framing extrusions flush with the raw edge of your concrete slab or timber deck. Always establish a mandatory 1.5-inch setback from the perimeter. This offset prevents the concrete anchors from spalling or cracking the slab edges under structural loads and thermal expansion.
- Snap a bright chalk line along the perimeter of the installation footprint, maintaining the 1.5-inch setback from the exterior edge.
- Establish corner squareness by verifying the 3-4-5 triangle rule (or measuring diagonal corner-to-corner distances; identical diagonal measurements confirm a true 90-degree rectangle).
- Use a rotary laser level or 4-foot spirit level to check the floor elevation across the entire span to map out slab slopes.
- Mark wall attachment points, verifying that vertical paths are clear of exterior hose bibs, electrical outlets, light fixtures, and downspouts.
Framing Systems: Extruded Aluminum vs. Vinyl Base Systems
Choosing your framing medium dictates your installation speed, structural span capacity, and resistance to coastal weather. Standard structural aluminum uses extruded profiles (such as 2×3 mainframes and 1×2 open-back channels) with integrated spline channels, whereas vinyl systems (such as Screen Tight) utilize a separate base track fastened to existing wood posts, concealed by a snap-on aesthetic cap.
| Feature / Specification | Extruded Aluminum System (e.g., 2″x3″ Framing) | Vinyl Base & Cap System (e.g., Screen Tight) |
|---|---|---|
| Primary Material | Heavy-gauge architectural aluminum alloy | Weather-proof, UV-resistant window-grade vinyl |
| Typical Framing Dimensions | 1″x2″, 2″x2″, 2″x3″, 1″x3″ mainframe extrusions | 1.5″ or 3.5″ wide base and cap strips |
| Structural Self-Support | Fully self-supporting; spans open patios independently | Requires existing wood or structural framing |
| Spline Retention Type | Narrow channel for round spline or flat spline | Dual spline tracks for .175″ round spline |
| Corner & Joint Assembly | Mechanical fasteners, corner clips, and mitered cuts | Butted flush joints; zero corner mitering required |
| Fastener Concealment | Screws exposed on clips (or internal screw bosses) | 100% hidden beneath snap-on exterior vinyl caps |
| Corrosion & UV Resistance | Electrostatic powder-coat finish resists salt air | Solid-color vinyl will not chip, peel, rust, or corrode |
For large spans and high durability requirements across Southwest Florida, exploring custom aluminum lanai enclosure options ensures your structure withstands regional environmental demands.
Step-by-Step Guide to Installing Screen Enclosure Frameworks

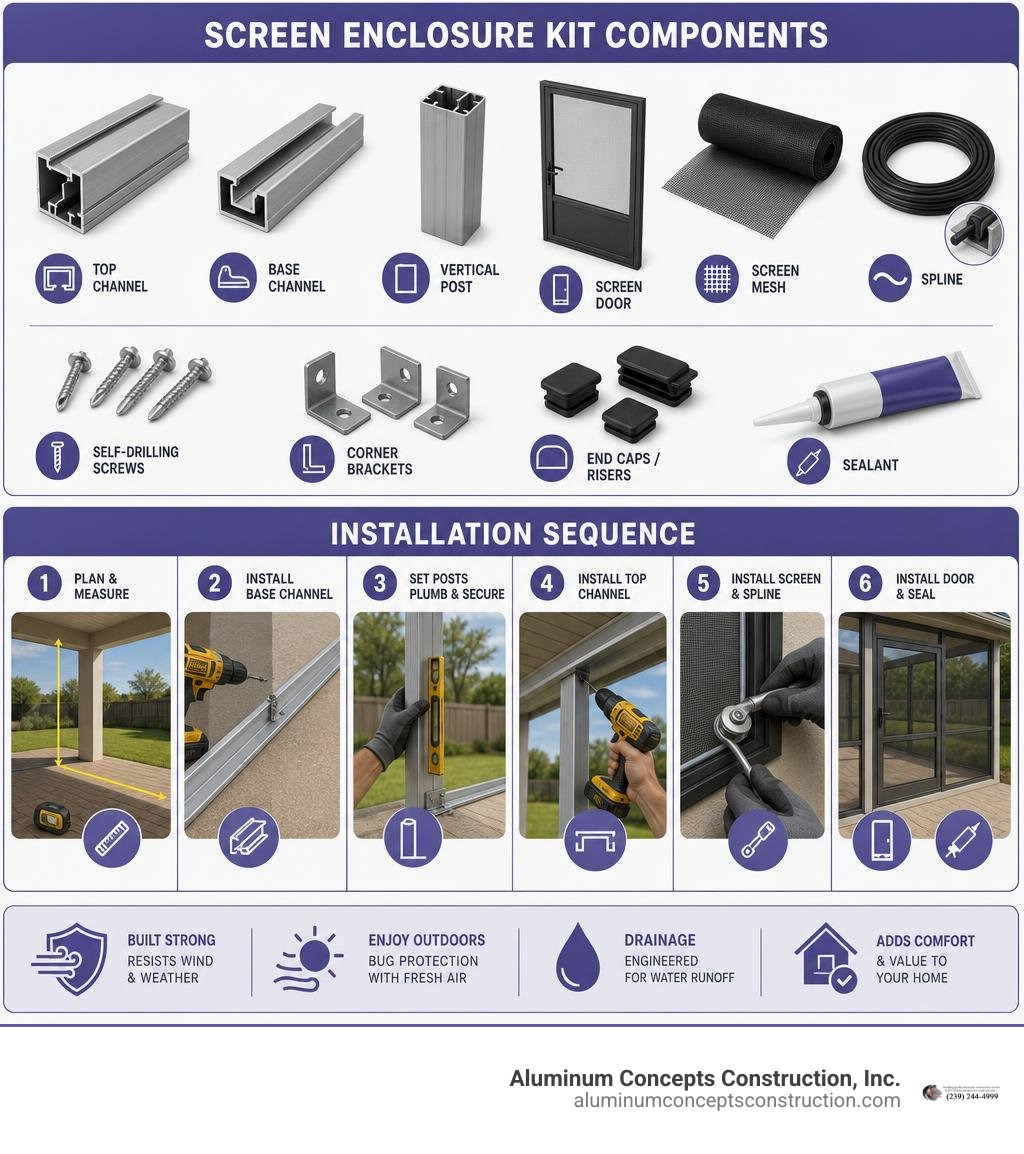
Erecting the framework requires steady sequencing. When working with structural kits, every vertical post and horizontal member relies on the base channel for square positioning.
Required Tools and Materials for Installing Screen Enclosure Projects
Gather your installation tools before unboxing materials:
- Cutting & Shaping: Miter saw or chop saw equipped with a non-ferrous metal-cutting carbide blade, hand deburring tool, and fine metal files.
- Drilling & Fastening: Cordless impact driver, variable-speed rotary hammer drill, 5/32″ and 3/16″ masonry drill bits, #2 and #3 Phillips and magnetic hex drivers.
- Layout & Leveling: 4-foot precision spirit level, torpedo level, 25-foot locking tape measure, chalk line, and non-marring rubber mallet.
- Screening Specifics: Heavy-duty screen rollerknife (convex and concave wheels), utility knife with extra razor blades, shears, and a hair dryer (for softening stiff spline in cooler weather).
- Safety Gear: Heavy-duty work gloves, ANSI-approved safety glasses, and hearing protection.
Securing Base Channels to Concrete, Brick, and Wood
The base channel (U-channel or 1×2 receiver track) forms the mechanical foundation for your enclosure walls.
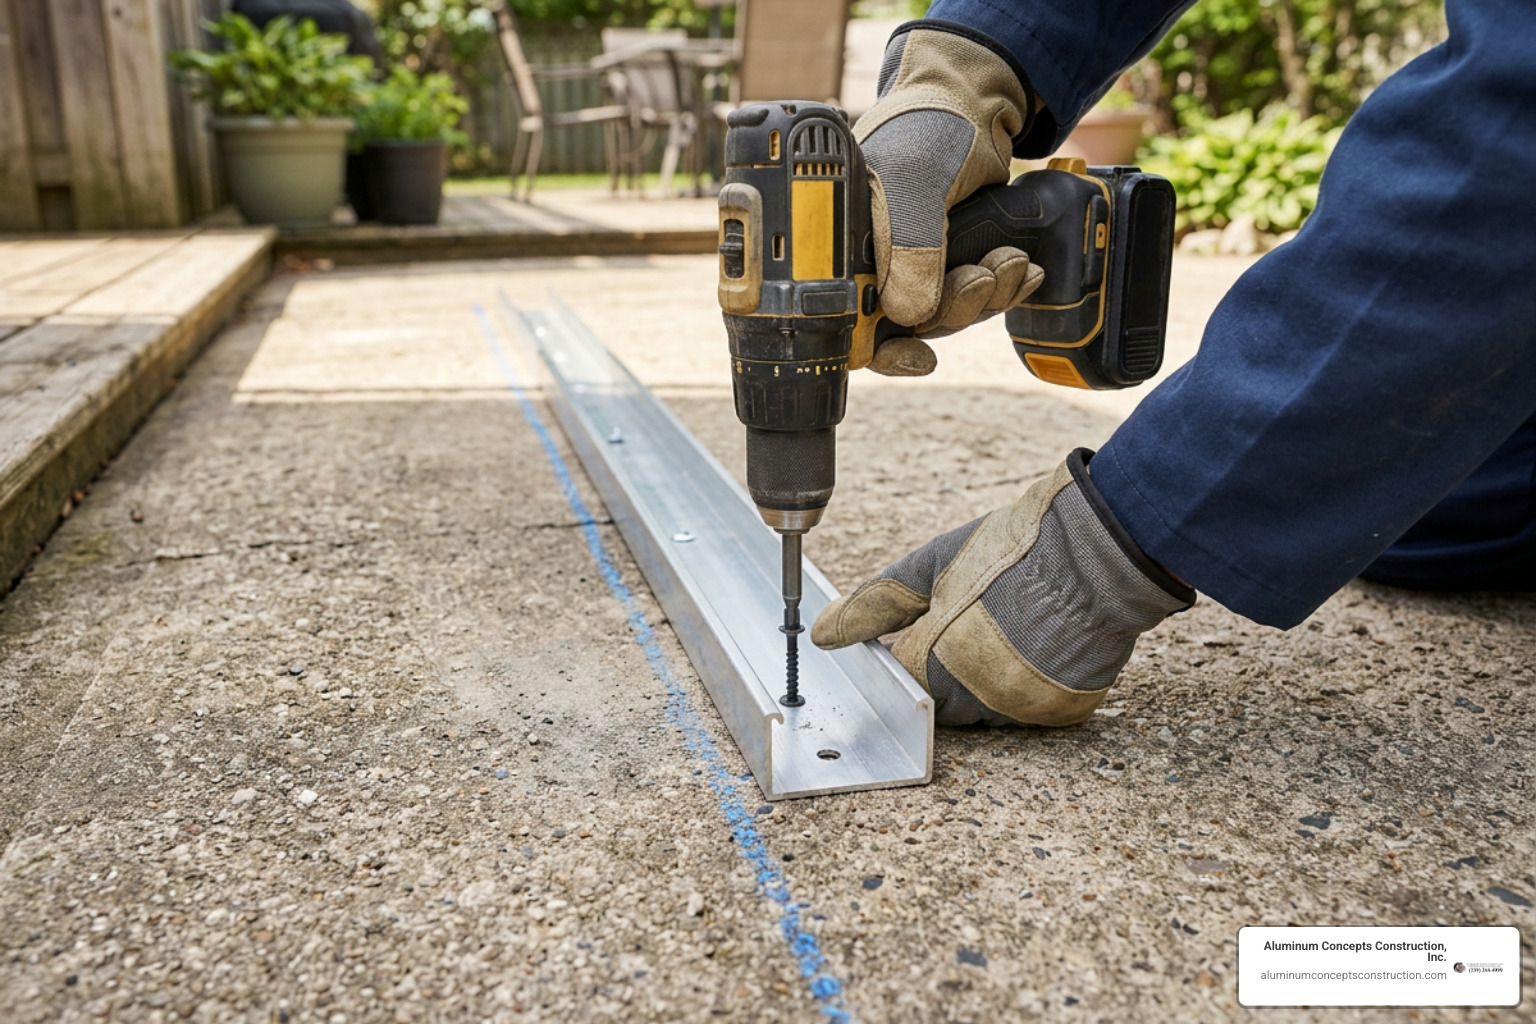
- Concrete Slabs: Lay down a continuous bead of high-grade exterior neutral-cure silicone sealant along the chalk line. Set the U-channel over the sealant. Drill pilot holes through the aluminum and into the cured slab using a hammer drill, spacing anchors every 18 to 24 inches. Drive 1/4″ x 2-1/4″ Tapcon masonry anchors firmly into place, taking care not to over-torque and strip the concrete substrate.
- Brick Pavers or Masonry: Anchor directly into the solid concrete footer beneath the pavers. Avoid securing base channels solely into loose sand-set pavers, which lack shear strength.
- Wood Decks: Place closed-cell foam tape or exterior caulk beneath the track to seal moisture paths. Fasten the channel directly into the structural joists or rim boards using #10 or #12 stainless steel wood screws spaced every 18 inches.
- Drainage Weep Holes: Standing water inside U-channels corrodes fasteners and invites mold. Drill 1/4-inch drainage weep holes along the exterior wall edge of the bottom channel every 3 to 4 feet to let rainwater escape.
Erecting Vertical Posts, Horizontal Rails, and Structural Kickplates
Once your perimeter channels are anchored, assemble the internal framework:
- Mount Vertical Channels: Cut 1×3 wall receiver channels to height and secure them plumb against the house siding or masonry walls using suitable anchors every 24 inches.
- Set Corner and Intermediate Posts: Slide 2×3 aluminum mainframes vertically into the floor U-channel and upper header channel. Use a 4-foot level to plumb the post on both axes. Secure the posts to the channels using self-tapping #10 Tek screws.
- Install Horizontal Chair Rails: A chair rail adds lateral rigidity to the vertical wall spans and provides a natural sightline break. Position the rail at a comfortable height—typically between 30 and 36 inches from the floor—using internal mullion clips and stainless fasteners.
- Attach Aluminum Kickplates: Kickplates shield the bottom of your screen from pets, yard debris, and lawn care equipment. Slide 0.024-gauge or heavier aluminum kickplate coil panels into the designated bottom channel grooves, securing them every 6 inches with matching self-drilling screws. For detailed hardware configurations, see the manufacturer Screen Wall System Specifications.
Screening, Splining, and Finishing Techniques
Proper mesh tensioning transforms a loose frame into a professional barrier. If you pull the mesh excessively tight, the structural uprights will bow inward like an archer’s bow; pull it too loosely, and the screen will flap noisily in the wind.
Rolling Mesh with Flat vs. Round Spline for Maximum Tension
When selecting screen mesh, 18×14 fiberglass mesh is standard for keeping insects out while preserving visibility. In high-exposure locations, consider protecting enclosures with specialized mesh designed to withstand heavy impacts.
- Round Spline (.175″ / .160″): For fiberglass mesh rolled into standard aluminum or vinyl base channels, use .175-inch diameter vinyl round spline. If you choose rigid aluminum wire mesh, step down to a .160-inch spline to compensate for the thicker material.
- Flat Spline Technology: Modern 3-inch wall systems use flat, ribbed locking spline. Flat spline wedges the mesh flat across the channel bottom, increasing surface friction and wind blowout resistance.
For vinyl systems where no mitering is required, follow the step-by-step Screen Tight Installation Manual. Always roll your spline using smooth, steady strokes from the center outward toward the corners, trimming excess mesh cleanly with your utility knife angled away from the spline channel.
Best Practices for Installing Screen Enclosure Doors and Hardware
- Verify Rough Opening: Maintain a plumb, square door opening precisely sized for your pre-hung screen door (standard rough opening width is 36 inches between vertical 2×3 framing posts).
- Mount the Hinges: Mount the heavy-duty aluminum piano hinge or three-leaf butt hinges to the vertical mainframe, ensuring the door swings outward away from the living area.
- Attach Pneumatic Closers: Mount a pneumatic door closer at the top rail and an optional second closer along the bottom rail for wind dampening. Adjust the cylinder screw so the door latches firmly without slamming.
- Fit the Bug Sweep: Attach a flexible vinyl bug sweep along the bottom interior face of the door slab to seal gaps against uneven concrete.
Snapping Trim Caps and Finishing Transitions
For systems utilizing snap-on components, finish the installation by seating the UV-resistant vinyl caps over the base tracks.
Position the cap over the fastened base and tap it into place with a non-marring rubber mallet until you hear an audible click along the entire length. If you ever need to replace a damaged screen panel, pry off the cap with a flathead screwdriver, remove the spline, rescreen, and snap the cap back on. Seal all structural wall interfaces with paintable exterior sealant.
Long-Term Maintenance, Ventilation, and Storm Preparation
Enclosing an outdoor patio alters airflow dynamics. When natural cross-ventilation stalls in humid climates, relative humidity inside an enclosure can rise 10 to 15 percentage points above ambient outdoor air. Sustained humidity levels above 60 percent invite mold and mildew growth on furniture and framing.
To maintain continuous airflow, ensure your enclosure design incorporates low-inlet openings and unobstructed high-soffit clearances to foster a natural stack effect.
- Cleaning Routine: Wash aluminum framing and screen mesh semi-annually with warm water, mild dish soap, and a soft-bristle car wash brush. Rinse thoroughly with a garden hose (avoid pressure washers, which can blast spline out of the channels).
- Hardware Maintenance: Lubricate door latches, stainless hinges, and closer pistons with dry silicone spray twice a year.
- Post-Storm Inspections: Inspect spline channels after severe wind events for popped sections. If you notice sagging, consult our screen replacement and repair tips to tighten panels before the spline deteriorates.
- Severe Weather: When preparing your home for major storm seasons, learn the best structural methods for hurricane proofing screened enclosures. For extensive panel damage or aging structural components, explore our professional rescreening service solutions to restore structural performance.
Frequently Asked Questions About Screen Enclosure Kits
How long does it take to install a DIY screen enclosure kit?
A standard patio screen enclosure typically takes 1 to 2 days for a crew of 1 to 3 individuals with basic DIY experience. Day one is focused on laying out base channels, leveling vertical posts, and securing horizontal chair rails. Day two is dedicated to rolling the screen mesh, hanging the pre-hung door, and installing the trim caps.
What spline size should I use for fiberglass vs. aluminum screen mesh?
For standard fiberglass mesh, use a .175-inch diameter round spline. For aluminum wire mesh, use a .160-inch spline. If your system utilizes proprietary flat spline profiles, use the manufacturer-specified flat spline designed specifically for that extrusion channel.
How often does screen enclosure mesh need replacement?
Standard fiberglass mesh has an average lifespan of 5 to 10 years, depending on direct ultraviolet (UV) sunlight exposure and proximity to coastal salt air. Upgrading to heavy-duty polyester or pet-resistant meshes can extend performance past 10 to 15 years.
Conclusion
Installing a screen enclosure is a practical way to expand your usable living space, eliminate insect hassles, and create a comfortable outdoor retreat. Taking the time to establish plumb posts, anchor base channels into concrete, and roll mesh with balanced tension ensures a professional result that stands up to weather.
When your property requires large architectural spans, integrated insulated roof panels, or engineered wind-load designs, our team at Aluminum Concepts Construction, Inc. is here to help across Fort Myers, North Fort Myers, Fort Myers Beach, Cape Coral, Bonita Springs, Sanibel, and Pine Island. Schedule a custom outdoor structure consultation with our licensed specialists to bring your outdoor living vision to life.
Comments are Disabled